I’ve over-engineered something that didn’t need to be regularly engineered in the first place.
Over the past many months I’ve been putting together a modpack for Minecraft. It’s basically just a list of mods to help with the more technical parts of the game, which I intend to use on a friend’s server when he starts that back up. THe pack is managed through Packwiz, which allows me to reference mods from both Curseforge and Modrinth, and it has functionality to update any mods in the pack if the author published a new version.
How do I know whether a mod update breaks the entire pack? There’s only one thing for it: I need (it’s definitely a need, right?) to run a modded Minecraft client in GitHub actions.
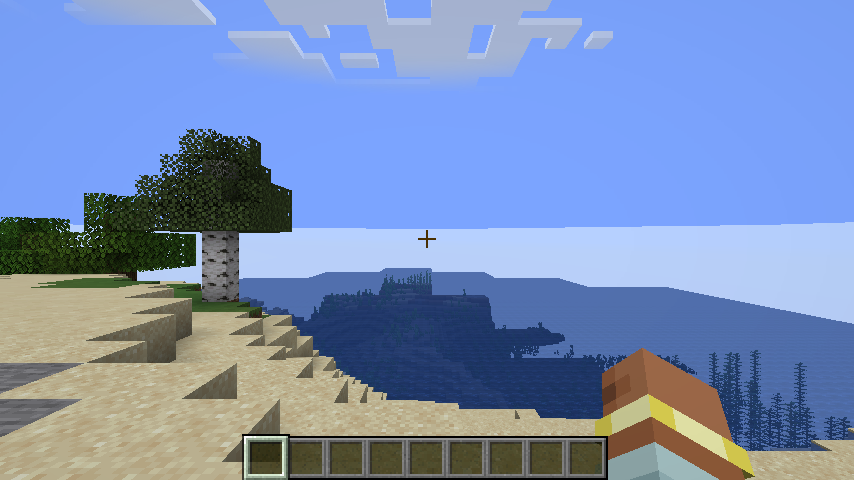
Spoilers, here’s the result:

Since there’s a lot more code behind the workflow now, I’ll be showing off the cool bits instead of pasting the entire workflow file. If you seriously want to run modded Minecraft in GitHub Actions yourself, let me know and I’m sure I can share more of it with you.
Doing graphical stuff in GitHub Actions
It probably isn’t a common use-case to run something that requires a graphical environment (browser tests are an exception, but headless Chrome already includes its own frame buffer so you don’t need another tool for that), but in case anyone ever does need to then maybe you’ll remember “that Minecraft blog post” and find the information you need.
The first obvious hurdle in running a Minecraft client in GitHub Actions is the fact that GitHub Actions runs on servers. Servers, notably, aren’t connected to a display which means that graphical applications don’t make sense. Minecraft is a video game, so it requires a graphical environment.
Xvfb
The project that made this whole thing work was Xvfb: the X Virtual Frame Buffer.
If you know about graphics and Linux, then the name “X Virtual Frame Buffer” will make total sense to you. For everyone else:
-
X is a protocol for running graphical applications, with a particular focus on allowing it to work over a network. The latest version, 11, was released in the late 80s with no real changes to the protocol since. This version number gives the protocol its other name: X11.
-
Virtual means it’s not physical. This is important for my use-case, as GitHub Actions runners don’t have physical screens because they’re just servers running in Azure. A virtual display is precisely what I need.
-
Frame Buffer is a technical term that just means a region of memory where pixel data is stored before it’s sent off to a display.
This makes Xvfb one of the most sensibly named projects in all of software: it’s a non-physical display for X.
Xvfb actually comes pre-installed in GitHub’s runner images, so we don’t need to install it! However, it’s not in the default image for nektos/act (a tool that allows you to run Actions locally) and I didn’t want my testing to just be pushing to GitHub and waiting for actions to run. I needed to make sure my workflows run locally too, and there are other packages I want to install too, so I’ll just be running apt-get install somewhere near the start of the workflow. (Unfortunately the cache-apt-packages action is broken in act so I can’t use that.)
Once it’s installed, you need to actually create a display. Linux uses the DISPLAY environment variable to assign applications to screens/displays (they’re different things in X, we don’t need to get technical).
yaml- name: Setup Xvfb run: | sudo apt-get update sudo apt-get install -y --no-install-recommends xvfb export DISPLAY=:1# For this step echo "DISPLAY=:1" >> "$GITHUB_ENV"# For future steps sudo Xvfb -ac :1 -screen 0 854x480x24 > /dev/null2>&1 &
Minecraft opens a 854x480 window by default, so I set the screen size to those dimensions and a colour depth of 24 bits (standard RGB). The :1 is shorthand for a display numbered 1 on localhost (remember X11 is a network-based protocol). Which number it is doesn’t matter, but I chose 1 in case GitHub ever decides to create a default display on :0.
From this point on, any graphical applications will be able to draw to this new display, which fulfills the goal nicely.
A note for Forge and Neoforge modpacks: you’ll also need to apt-get install libxtst6 and libxi6, otherwise the game will crash on startup. These aren’t required for Fabric and Quilt.
Taking a screenshot and adding it to a PR comment
I want to make sure that the Minecraft client doesn’t crash when I update any mods in the pack. While I could just make sure the process doesn’t exit within some time, a far better representation of success is seeing the game actually drawn to the screen. In case this workflow run was triggered from a Pull Request, it’d also be great to post the image on there too. That way I could see whether the game crashes (black screen), gets disconnected from the server for mod incompatibilities (error screen), or connects successfully (the game runs fine).
Unfortunately, Xvfb doesn’t come with any screenshot utilities so we’ll need to install one. The x11-apps package includes the xwd binary (X Window Dump), so we’ll be adding that to the apt-get install above. This outputs the file in a different format, so we’ll also need to convert into something sensible like PNG.
The command-line image manipulation scene is pretty stable thanks to ImageMagick. Luckily for us, both GitHub Actions and act’s default images contain ImageMagick and its parts (notably the convert binary, which does what it says on the tin).
bashxwd -display $DISPLAY -root -silent | convert xwd:- png:./screenshot.png
The convert half of the command says “take xwd image data from STDIN (-) and write PNG image data to screenshot.png."
Unfortunately, GitHub doesn’t allow the upload of images through their API, so the only way to include this screenshot in a PR comment is by uploading the screenshot to a public service and then linking to it from there. I chose Imgur for this. You do need an API key for it, but there’s no cost or review process involved. All you need to do is avoid the ad-riddled SEO-driven pseudo-social media site that’s attached. Once you have the API key, you can store it in the Actions secrets in GitHub and use it while curling the Imgur API. The response is a JSON object with the image URL in it, which can be extracted with jq.
I also decided to add the image to a job summary, which means it shows up when looking at the run summary in GitHub. That’s done by just writing the content to a special file, similar to $GITHUB_OUTPUT and $GITHUB_ENV. As for actually adding the PR comment, I use a 3rd-party action as it does smart things like checking to see if a comment with the same ID has already been posted to the PR and edit that one instead of creating more comments.
yaml- name: Add job summary run: | cat << "EOF" >> job-summary.md ## ${{ matrix.pack-directory.pack }} ${{ matrix.pack-directory.directory }} screenshot  EOF cat job-summary.md >> $GITHUB_STEP_SUMMARY- name: Add PR Comment uses: mshick/add-pr-comment@v2 if: github.event_name == 'pull_request' with: message-id: "modpack-test-client-${{ matrix.pack-directory.pack }}-${{ matrix.pack-directory.directory }}" message-path: job-summary.md
If anyone knows how to do Heredoc strings properly, so that I don’t have to hard-code a unique identifier that’s unlikely to appear in the content, please let me know.
Running Minecraft in GitHub Actions
If only this was easy.
This is definitely less work-related, but if the entire conceit of this blog post is “lol I ran Minecraft in a CI/CD system” then I’d better talk about it.
Starting a server
Of course, I made this harder for myself. My modpack is aimed at players on unmodded servers, so I wanted to test the modded client connecting to an unmodded server. Cutting a long story short, I use the mcenv/setup-minecraft action to install the server and figure out which version of Java is required (different versions of Minecraft need different versions of Java). Then I install Java using actions/setup-java, and the server is almost ready. It just needs some light configuration to ensure that the client will be able to connect. Since we want to be able to continue the workflow after starting the server we will need to start the server in the background. Since it takes time for the server to start, we also need to wait until a log message appears in the logs.
yaml- name: Start Minecraft server working-directory: server timeout-minutes: 6 run: | cat <<EOF > server.properties online-mode=false level-seed=1 gamemode=creative EOF echo "eula=true" > eula.txt nohup java -jar $MINECRAFT nogui&> server.log & sleep 1 timeout 5m grep -q 'Done ([.[:digit:]]*s)! For help, type "help"' <(tail -f server.log) || exit 1
This script creates a vanilla server, which is all that I needed for my pack. I have been working on a modded version that also installs mods, but it’s not ready for prime time yet.
A lot of these steps have explicit timeouts on them, so in case something does go wrong (and it has), the runner isn’t running for an hour doing nothing useful.
The server needs to be started with nohup, as GitHub Actions tries to clean up all processes started by a script. Without it, the server will be killed immediately after this step of the workflow finishes. There’s also a 1 second sleep to ensure that the server.log file is created, otherwise the tail -f fails.
The Fabric and Quilt mod loaders don’t print the vanilla “Done!” message at the end of the loading process, so you’ll need to wait for some other log message. In the previous post, where I ran a server with one of those loaders, I listened for when the server had loaded the advancements. However unmodded, Forge, and Neoforge servers do this step really early, so listening for that in all cases won’t work.
Starting the client
This is where things get weird. The Minecraft client is much more complicated than the server, as installing it requires downloading a lot of platform-specific libraries and game assets beyond the basic Minecraft .jars. Luckily for me, someone else has written portablemc, which handles the installation of a Minecraft client as well as installing different mod loaders for it. Perfect. All I have to do is also install Python into this runner along with all of the other things I’ve had to install so far to make this work.
yaml- name: Setup Python uses: actions/setup-python@v5 with: python-version: "3"- name: Install portablemc working-directory: client timeout-minutes: 5 run: | pip install --user --progress-bar off portablemc export PATH="$PATH:$HOME/.local/bin" echo "$HOME/.local/bin" >> $GITHUB_PATH # Install without starting the game.# This means the timeout for the actual run won't be waiting on installation portablemc --main-dir .minecraft --work-dir profile start fabric:${{ steps.get-minecraft-version.outputs.minecraft-version }} --jvm "${{ steps.java.outputs.path }}/bin/java" -u Dinnerbone --dry
Then it’s just a matter of installing the modpack to the client. In the previous blog post I used a tool called mrpack-install, but I later discovered that this is only for server installation and doesn’t install client-only mods. This makes it completely useless for my use-case, which is running all of the mods on the client. So, I did whatever any reasonable person would do: read the documentation for the modpack format and write my own extraction code. In Bash. It wasn’t really that bad, but I sped up the process by asking ChatGPT for the skeleton and then fixing the really obvious errors it made.
At this point, we have a fully set-up modded Minecraft client, now we just need to run it. Annoyingly, the client doesn’t print “hello I’ve joined the server” to the client logs, so instead we need to read the server logs again…
yaml- name: Run Minecraft client id: minecraft-client working-directory: client continue-on-error:true timeout-minutes: 6 run: | # Turn off first time onboarding cat << EOF > profile/options.txt skipMultiplayerWarning:true onboardAccessibility:false joinedFirstServer:true tutorialStep:none EOF echo Starting Minecraft client. This will take some time. portablemc --main-dir .minecraft --work-dir profile start fabric:${{ steps.get-minecraft-version.outputs.minecraft-version }} --jvm "${{ steps.java.outputs.path }}/bin/java" -u Dinnerbone -s localhost -p 25565&> client.log & sleep 1 timeout 5m grep -q 'Dinnerbone joined the game' <(tail -f ../server/server.log) || exit 1 # Grace period for player to properly load into game echo Player joined server. Waiting for some time for eveything to load sleep 20
The extra sleep at the end is there because the server prints the log message as soon as connection is established, but this is before it has sent any world data to the client. It’s still a few more seconds before the game removes its loading screen and starts drawing the world.
Finally, after all this, we now have the server running and the client connected to it while drawing of a virtual display. It’s time to take that screenshot, add it to the summary, post the PR comment, and rejoice that the 30+ hours I spent to get this working is over.
Why?
Because I can.
And I wanted to.
I had already stated my intentions to do this in the last post, I just needed to figure out how to get it all to work. Alongside this I was also improving my auto-update workflow, so now every week I get a fresh PR in my inbox that updates all of the mods in the pack and updates the changelog and version number. After the changes described in this post, a few minutes later the testing workflow finishes and adds an image to the PR. All I need to do each week is hit merge, trigger the release workflow, sit back, and relax. I have successfully automated about 10-15 minutes of work after… over 60 hours for sure.